[Julius Curt] needed to mark acrylic panels with a bit more clarity than the usual way of rastering the surface, so they attempted to 3D print directly to an acrylic sheet, which worked perfectly. The obvious way to do this was to bond the acrylic sheet to the bed with glue temporarily, but another way was tried, and it’s much less messy and precarious.
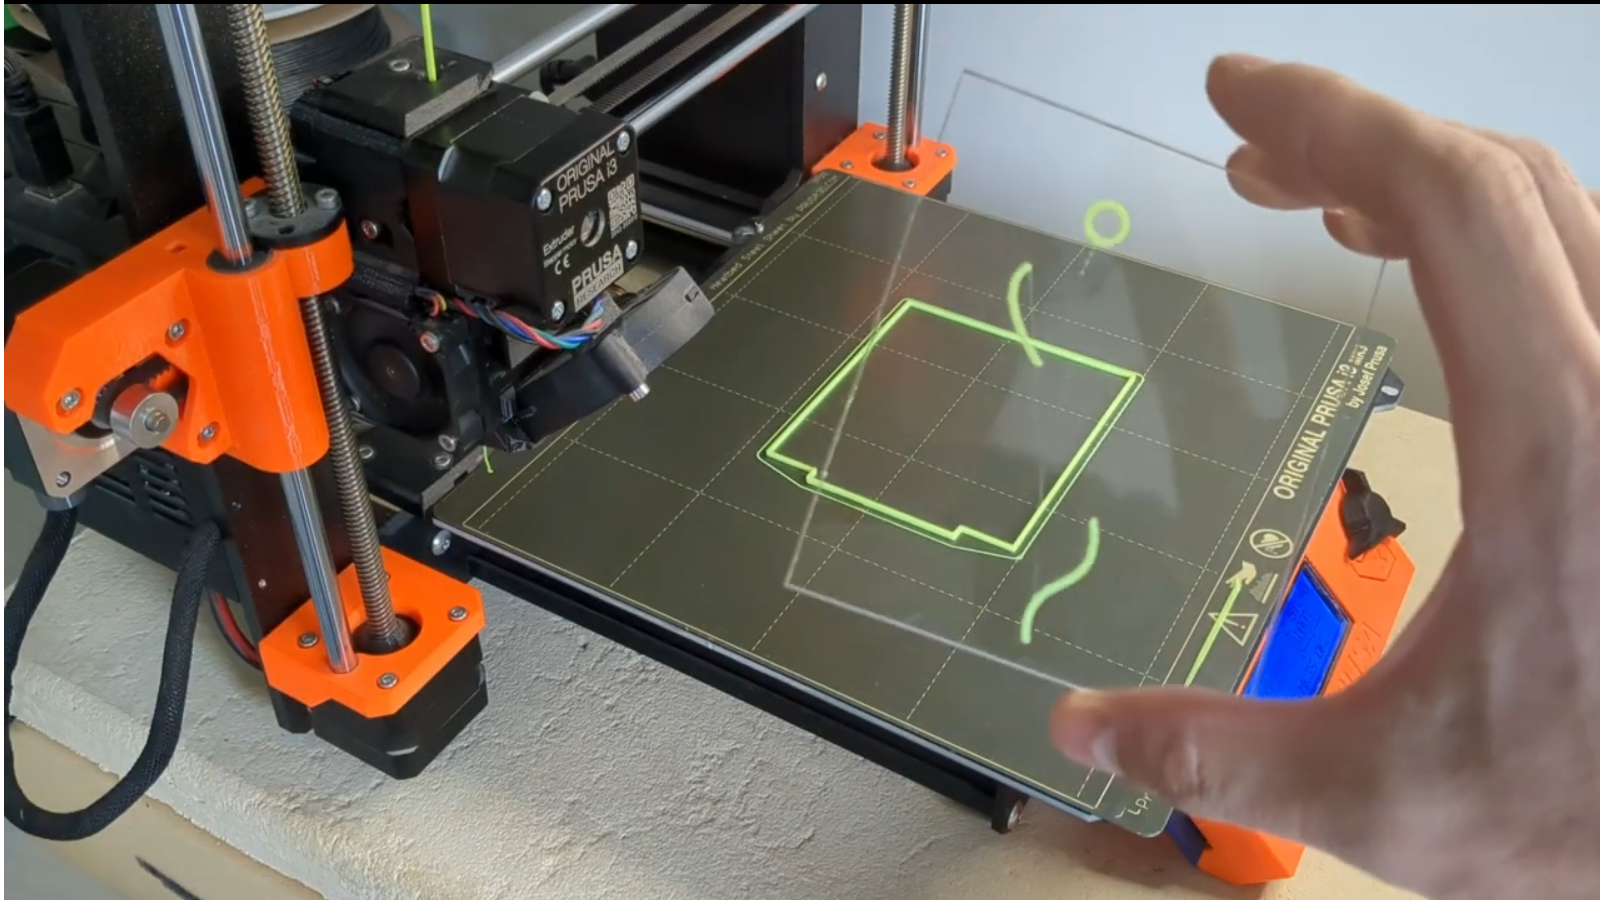
The first step was to create a 3D model which combined a constraining ‘fence’ to contain the acrylic panel with the required artwork floating above. It was easy enough to run the print long enough to build the fence, then pause the print mid-way to add the pristine panel and restart after a quick re-prime and wipe.
There were a few simple takeaways from the video below. First, to ensure sufficient tolerance between the fence and the panel, consider the layer width (plus associated tolerance when printed) and the laser kerf of your machines to ensure a not-too-sloppy fit. Secondly, that hot nozzle won’t do the acrylic surface any favours during travel moves, so enabling Z-hopping is essential!
Another use for this simple technique is to fully incorporate an acrylic sheet within a print by pausing at an appropriate height again, dropping the panel in, and continuing the print. A degree of overlap will lock the panel tight, with the plastic bonding very firmly to the acrylic, as [Julius] demonstrates in the video.
It’s always a delight to see how techniques can combine to create the desired effects. Here’s how to use a color laser printer and toner transfer paper to apply designs to a 3D printing front panel. Whilst we’re thinking about the multitude of uses for hacking with acrylic, what about not doing that and using corrugated plastic instead?