We would not be surprised if DSI screens made up the majority of screens on our planet at this moment in time. If you own a smartphone, there’s a 99.9% chance its screen is DSI. Tablets are likely to use DSI too, unless it’s eDP instead, and a smartwatch of yours definitely will. In a way, DSI displays are inescapable.
This is for a good reason. The DSI interface is a mainstay in SoCs and mobile CPUs worth their salt, it allows for higher speeds and thus higher resolutions than SPI ever could achieve, comparably few pins, an ability to send commands to the display’s controller unlike LVDS or eDP, and staying low power while doing all of it.
There’s money and power in hacking on DSI – an ability to equip your devices with screens that can’t be reused otherwise, building cooler and cooler stuff, tapping into sources of cheap phone displays. What’s more, it’s a comparably underexplored field, too. Let’s waste no time, then!
Decently Similar Internals
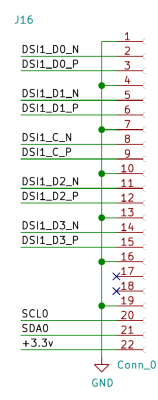
DSI is an interface defined by the MIPI Alliance, a group whose standards are not entirely open. Still, nothing is truly new under the sun, and DSI shares a lot of concepts with interfaces we’re used to. For a start, if you remember DisplayPort internals, there are similarities. When it comes to data lanes, DSI can have one, two or four lanes of a high-speed data stream; smaller displays can subsist with a single-lane, while very high resolution displays will want all four. This is where the similarities end. There’s no AUX to talk to the display controller, though – instead, the data lanes switch between two modes.
The first mode is low-speed, used for sending commands to the display, like initialization sequences, tweaking the controller parameters, or entering sleep mode. You can capture this with a logic analyzer. If you’ve ever sniffed communications of an SPI display, you will find that there are many similarities with how DSI commands are sent – in fact, many SPI displays use a command set defined by the MIPI Alliance that DSI displays also use. (If your Sigrok install lists a DSI decoder, don’t celebrate too soon – it’s an entirely different kind of DSI.)
The second mode is high-speed, and it’s the one typically used for pixel transfer. A logic analyzer won’t do here, at least not unless it’s seriously powerful when it comes to capture rate. You will want to use a decent scope for working with high-speed DSI signals, know your way around triggers, and perhaps make a custom PCB tap with a buffer for the the DSI signal so that your probe doesn’t become a giant stub, and figure out a way to work with the impedance discontinuities. Still, it is very much possible to tap into high-speed DSI, like [Wenting Zhang] has recently demonstrated, sometimes an approximation of the high-speed signal is more than enough for reverse-engineering.
Got a datasheet for your panel? Be careful – the initialization sequence in it might be wrong; if your bringup is not successful or your resulting image is weird, this just might be the culprit, so even if you have procured the correct PDF, you might still end up having to capture the init sequence with a logic analyzer. Whether your display’s initialization are well-known, or you end up capturing them from a known-working device, you will need something to drive your display with – a typical Arduino board will no longer do; though, who knows, an RP2040 just might, having seen what you all are capable of.
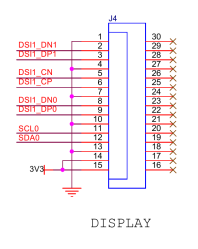
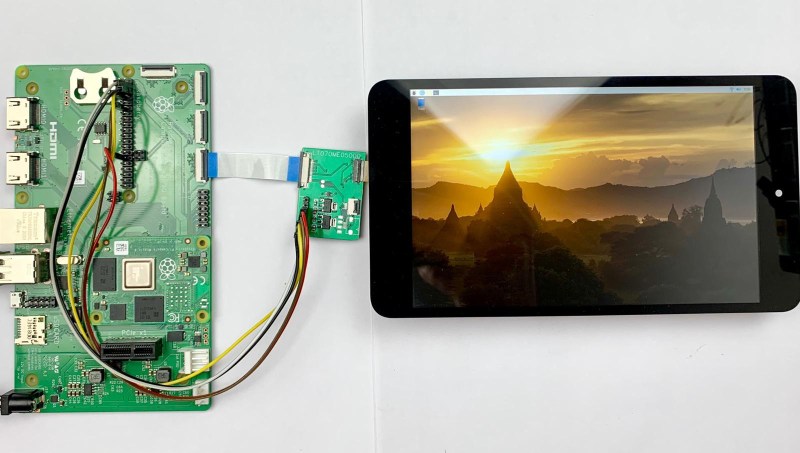
 Ideally, you will want a microcontroller or a CPU that has a DSI peripheral, with decent documentation and/or examples on how to use it – that part is important. Linux-capable Raspberry Pi boards can help you here a surprising amount – you may remember the Raspberry Pi DSI header as being proprietary, but that was only true initially. With developments like the official Raspberry Pi screen and open-source graphics drivers aided by that $10k driver bounty they put out, it became viable to connect custom screens. WaveShare DSI screens are a known alternative if you want to get a DSI display for your Pi. On the regular Pi, you only get two lanes of DSI, but that is good enough for many a display. Funnily enough, you can get a third-party display for your Pi that uses the same panel, with two extra chips that seem to run the display without a driver like the official Pi display (this thread on these displays is fascinating!); the display is still limited to the same resolution, the only advantage is a slightly lower price, and the ability to overload your 3.3V rail is a questionable benefit. It’s not quite clear why this display exists, but you might want to resist the temptation.
 If you’re using a Pi Compute Module, you get entire two DSI peripherals to play with, one four-lane and one two-lane, and it doesn’t take long to find a good few examples of Raspberry Pi Compute Module boards with DSI screens. If you have a Compute Module and its devboard somewhere on a shelf, you can do four-lane DSI, with a Linux-exposed interface that works in the same way alternative OSes do on your phone. Given that CMs are typically used for custom stuff and a hacker using one is more likely to have patience for figuring out DSI panel parameters, a Compute Module baseboard is a pretty popular option to hack on that one cheap DSI display from a tablet that caught your eye! Don’t have a baseboard? You can even etch one, here’s a single-layer breakout with a DSI socket. Not that you don’t need a Compute Module if you’re doing two-lane DSI: a regular Pi will do.
So, get out there and hack – there is a ton of unexplored potential in the never-ending supply of aftermarket screens for older iPhone and Samsung models! Speaking of phones, they are the forefront of DSI hacking, as you might suspect, thanks to all the alternative OS projects and Linux kernel mainlining efforts. You can enjoy fruits of their labour fairly easily, sparing you a logic analyzer foray – reusing a seriously nice DSI display might be as easy as loading a kernel module.
Want A Panel? Linux Is Here To Help
There’s a fun hacker tactic – if you’re looking for an I2C GPIO expander chip, you can scroll through the Linux kernel config file that lists supported GPIO expanders, and find a good few ICs you’ve never known about! What’s great is, you know you’re getting a driver, too.
The same goes for DSI screens, except the payoff is way higher. If you’re on the market for a DSI screen, you can open the list of Linux kernel drivers for various DSI panels. Chances are, all you need is just the physical wireup part, maybe some backlight driving, and a Device Tree snippet.

Want a $20 1920 x 1200 IPS display for your Compute Module? Who doesn’t! Well, wouldn’t you know, the Google Nexus 7 tablet uses one, and the driver for it is in mainline Linux! Just solder together a small FPC-to-bespoke-connector adapter board (or order PCBA), add a Device Tree snippet into your configuration, and off you go; there are even custom boards for using this display with a CM4, it’s that nice.
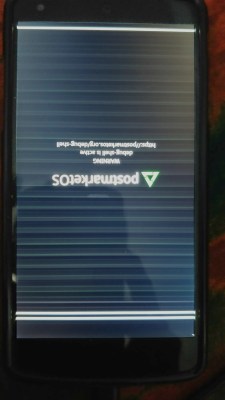
 New displays get added into the kernel all the time; all it takes is someone willing to poke at the original firmware, perhaps load a proprietary kernel module into Ghidra and pull out the initialization sequence, or simply enable the right kind of debug logging in the stock firmware. All of this is thanks to tireless efforts of people trying to make their phones work beyond the bloatware-ridden shackles of the stock Android OS; sometimes, it’s some company doing the right thing and upstreaming a driver for a panel used by hundreds of thousands of devices in the wild.
There are some fun nuances in the display scene, as much as of a “scene” it is – people are just trying to make their devices work for them, then share that work with other people in the same situation, figuring out a display is part of the process. It’s not uncommon that a smartphone will use slightly different screens in the same batch – it’s an uncommon but real issue with alternative OSes like LineageOS, where, say, 10% of your firmware’s users might have their panel malfunction because, despite the phone listing the same model on the lid, their specific phones use a display with a different controller, that only the manufacturer’s firmware properly accounts for.
Our DSI Role Models
These are the basics of what you need to reuse DSI displays as if effortlessly. Now, I’d like to highlight a good few examples of people hacking on DSI, from our coverage and otherwise.
Without a doubt, the first one that springs to mind is [Mike Harrison] aka [mikeselectricstuff], from way back in 2013. I’ve spent a lot of time with the exact iPod Nano being reverse-engineered, and [Mike]’s videos gave me insight into a piece of tech I relied on for a fair bit. For instance, in this video, [Mike] masterfully builds a scoping jig, solders microscoping wires to the tiny PCB, walks us through the entire reverse-engineering process, and successfully reuses the LCD for a project.
Following in [Mike]’s footsteps, we’ve even seen this display reused in an ESP32 project, thanks to a parallel RGB to DSI converter chip!
[Wenting Zhang] reverse-engineering a Macbook Touchbar display is definitely on my favourites list. In this short video, he teaches us DSI fundamentals, and manages to show the entire reverse-engineering process from start to end., no detail spared. Having just checked the video description, the code is open-source, and it’s indeed a RP2040 project – just like I forecasted a good few paragraphs above.
Are mysterious ASICs your vibe, and would you like to poke at some firmware? You should see this HDMI-to-DSI adapter project, then. The creator even turns it into a powerbank with a built-in screen as a demo – that’s a hacker accessory if I’ve ever seen one. More of a gateware fan? Here’s an FPGA board doing the same, and another one, that you can see here driving a Galaxy S4 screen effortlessly. Oh, and if you are friends with a Xilinx+Vivado combination, there are DSI IP cores for you to use with barely any restrictions.
The Year Of DSI Hacking
DSI is an interface that is becoming increasingly hacker-friendly – the economies of scale are simply forcing our hand, and even the microcontroller makers are following suit. The official devboard for Espressif’s ESP32-P4, a pretty beefy RISC-V chip, sports a DPI interface alongside the now-usual CSI for cameras. We will see DSI more and more, and I raise a glass of water for numerous hackers soon to reap the fields of DSI. May your harvest be plentiful.
I thank [timonsku] for help with this article!
